Showing posts with label Dessert. Show all posts

Friday, March 30, 2012

My first crepes

I imagine most of you would be surprised to learn that I've never made crepes until a few days ago. They haven't been the usual weekend breakfast at any point in my life either. I guess that explains why I only remember about them when I see the pictures of food bloggers' creations. In retrospect, I've always thought they'd be somewhat tricky to make as the first image that would come to mind is the flying and flipping crepes, inevitably landing on the stove/floor. It's not exactly encouraging. Finally I thought I'd try though. 

Baby steps! That's what I've come to understand as the never failing recipe for achieving anything challenging. Let's face it. Crepes are challenging! So, I took the smallest pan I've got, pulled up my sleeves and began working on what turned out a dozen of delicious crepes. Thank you, TEFLON for making my life easier! :)


Ingredients

2 cups flour
2 cups milk
5 small eggs
1/2 cup vegetable oil
3 tb. sp. sugar
1/2 t. sp. salt

Method

1. Mix all the ingredients until they've integrated well.
2. Heat a greased pan and pour enough of the mixture to cover the bottom of the pan, trying to keep the crepes as thin as possible. (Mine could have been thinner.)
3. Cook at a medium high temperature for about 1 minute and then turn the crepe to cook the top side.
4. Repeat the same with the rest of the mixture.

I had mine with honey (yummy), while also wishing for some fresh berries. 

The picture on the right is a nod to the very talented food photographer and stylist Eva Toneva who originated the idea about rose crepes presented in cups.


Sunday, February 12, 2012

Orange chocolate chip cookies


Fruit or chocolate? Cookies or cake? Why not have it all in one? That's what orange chocolate chip cookies are for me. I and the raising eyebrows' taster at home particularly like the combination of orange and chocolate, as I'm sure most of you dear readers do.

I'm too tired to write anything else except the recipe, but if I have time tomorrow, I'll tell you why... or most likely show you. Winter and sea lovers will be excited to see. ;)

Ingredients

2 1/2 cups flour
1/2 cup butter/ coconut oil (I prefer the latter, as it adds a little more exotic feel to the cookies)
1/2 cup sugar
2 eggs
4 tb. sp. orange juice
1 t. sp. orange zest
1 t. sp. baking powder
1/2 t. sp. baking soda
1/4 t. sp. salt
chocolate chip


Method

1. Mix the butter/ coconut oil with the sugar until creamy.
2. Add the eggs one by one, whisking them well.
3. Add the orange juice and zest and continue whisking.
3. Add the baking powder, the baking soda and the salt to the flour and sift it in the bowl where the wet ingredients are. Mix well together.
4. Finally, add the chocolate chip and integrate in the dough. 
5. Let it rest wrapped in plastic foil in the fridge for a day. (I wasn't feeling like waiting, so I made them the same day.)
6. Bake in a 200 C oven. Let them cool for about 5 minutes, before you remove them from the baking paper. Leave them on a rack to cool additionally. Enjoy! :)

I also did a batch with coffee and raisin, but they weren't as good.


Friday, February 10, 2012

Cinnamon buns


In a few minutes we're going for dinner with a lovely Bulgarian family, so I thought I'd make the dessert. I've been thinking about trying cinnamon buns ever since I read Kanelbullar post, but I only got to them today. I mostly followed the recipe, except that I made about 1/6 of the size, used the egg for the dough, replaced the dried yeast with fresh yeast and I also used raisin instead of topping the rolls with sugar. Now, I somewhat regret the choice, as their shape got a bit all "over the place" or in other words, they popped too much. However, I'm also conflicted by the very pleasing taste they create. Next time, I think I'll just cut the raisin in very small pieces... maybe that'll work. In any case, I'm sure they'll be savored. :)

Wednesday, February 8, 2012

Apple pie


Previously, I've made an apple tart with pastry cream, which is a fabulous dessert to share with friends. Its thin crust leaves plenty of space for the abundance of cream and apples, which I love. Pastry cream is more of a festive dessert ingredient for me though. On the other hand, I'm very fond of fruit infused pastry for a weekday dessert. Apple pie, maybe? Yes, that's what sprang in my mind first. If I had thought about it some more, I would have gone for crumble, but there is always a next time. :)

Ingredients

2 cups flour
100 g. butter
1/3 cup sugar
2 egg yolks
1/2 tb. sp. icy water

2 apples
1 tb. sp. corn starch 
1 tb. sp. oatmeal 
1 tb. sp. sugar

Method

1. Mix the butter and the sugar together until creamy. 
2. Add the icy water and the egg yolks one by one, whisking them well together.
3. Finally add the flour and quickly form soft dough. Refrigerate for about 1 hour wrapped in plastic foil.
4. In the meantime, peel and cut in small cubes the apples. Mix them with the corn starch, oatmeal and sugar. (Alternatively, you can use nuts, which will absorb the moisture of the apples.)
5. Roll out a bottom and a top crust layer from the cooled dough. 
6. Place the first in a tart form(s) and spread the apples on top of it. Then cover it with the top layer. Cut the crust with a fork on a couple of places, so the pie can breathe. Bake at 200 C until ready.

I'm gonna try a vegan version of this some time before the winter has passed. Pretty optimistic about it too. :)


Thursday, February 2, 2012

Orange coconut mini cakes

The post today is somewhat a continuation of yesterday's note on the use of vegetable oils. Yes, I'm seriously considering how to banish butter from my kitchen. In the meantime, I want to make sure that I don't end up using only olive oil... it tends to get boring after a while. Not to mention that its flavor doesn't necessarily work well with all sorts of baked goodies. Fortunately, a friend of mine is also very fond of healthy foods and we discuss this stuff often. Every once in a while, I'd see her spread thinly coconut oil (it's hard unless melted) and honey on a slice of bread and give it to her kids... I have no words to describe just how delicious it is. So, when yesterday I stumbled upon this Little lemon coconut cakes recipe, I thought I'd make it and share the results with the gang.


I made a few changes, cause I just can't follow recipes strictly. I also am not particularly interested in a wholly sweet cake. I favor very light sweetness with the occasional dried fruit which gives a little sweet and flavorful surprise to the cake. Thus, I used only half the sugar, added half a banana and a handful of raisin, and then replaced the lemon with orange. Finally, I skipped the glaze. I didn't have agave nectar and I wasn't planning on buying some anyway. Using sugar wasn't an option either. It just spoils the otherwise perfectly balanced flavors. This way, the cakes are better suited for kids too. Yey! Quite happy with the result, I tell ya. It looks more like mini fruit bread, I know... but that's what I love about them.


A note on coconut oil: "To clear things up, coconut oil does contain saturated fat, but lucky for us, it comes in the form of medium-chain triglycerides (or MCTs). This type of fat differs from the types of fat we normally consume from both plant and animal sources, which are long-chain triglycerides (or LCTs). Without getting too technical, MCTs are easily digested, absorbed, and utilized in the body because their molecules are smaller than those from LCTs. This means that unlike other fats, they require less energy and fewer enzymes to break them down for digestion. They are an excellent choice of fat for active people and athletes as MCTs digest immediately to produce energy and stimulate metabolism. They are also ideal for those who suffer from digestive disorders and are often given in hospitals to provide nourishment for critically ill people who have trouble digesting fat." (My New Roots). Do visit the site, if you want to be impressed! :)

Wednesday, January 25, 2012

Vegan raspberries ice-cream


It's been one of those days when everything just had to be frozen. I woke up in the morning looking at the frosty field behind the dorm, thinking that it is as good time as any to take a walk with a poncho instead of a coat. First mistake! Then I thought that I'd go for a run in the evening, as I'm planning to register for a 10km motorway run on 24th March in Kliplev. Had I been more considerate and taken the less windy streets, while avoiding the particularly open beach area, things might have passed uneventfully. But no! Second mistake! Since it's Wednesday, I wanted to prepare something vegan and fruity. For reasons unknown to me (to be read as bad judgement), I immediately decided on raspberries ice-cream. No matter how delicious, it tipped off the balance and I've been feeling particularly under the weather for a bit now. Hopefully that passes by tomorrow and I get a bit smarter about my everyday choices.


Never mind common cold, here is raspberries ice-cream - a simple, super healthy and delicious treat for kids and adults!

Ingredients

250 g. frozen raspberries
1 banana
100 g. coconut milk

50 g. coconut milk 
1 tb. sp. vanilla sugar 

Method

1. Blend the banana, the frozen raspberries and the 100 g. coconut milk until smooth. Pour in serving glasses or in a bowl and leave in the freezer for 2-3 hours. (I had very little patience, so I waited just 30 min; it melted almost instantly.)
2. Mix the remaining coconut milk and the vanilla sugar to use as sauce. (It was nice, but too much! Next time I'm gonna put a mint leave for looks and leave it at that. ;))


Wednesday, January 18, 2012

Peach and cocoa cream (Vegan)


I had a mission: present my lovely fruit salad of diced oranges and pears topped with home-made vegan pear ice-cream and a hint of honey. Time wasn't on my side though and the ice-cream thickened only after it was dark outside. No matter how I tried to photograph the plate, it just wasn't as good as day-light photographed food. That's probably because I'm only equipped with a flash, but also because I'm clueless how to be creative with the lights at home. Truth be told, right now it doesn't make the top of my list of tricks to learn anyway.

Since the pear ice-cream is a simplified version of the peach and cocoa cream, I'll dedicate this post to the latter.

Ingredients

3 peaches
1 banana
20 g almonds
400 g coconut milk
1 1/2 spoon cocoa powder
2 t. sp.  honey

Method

1. Mix the coconut milk with the honey.
2. Peal the peaches and start blending them with the banana and the almonds. Continuously add 320 g. coconut milk and blend until smooth.
3. Pour the mixture in serving glasses/ bowls, leaving a little space for a tiny layer of the cocoa cream.
4. Combine the remaining coconut milk with the cocoa powder until well integrated.
5. Pour the cocoa cream on top and keep the layer thin. (The cocoa layer is a bit bitter, as I don't add more honey, but I like the contrast it creates. Feel free to adjust!)
6. Let the cream refrigerate for an hour, so it can thicken. Serve cold!


Vegan desserts - the kind that makes you feel good even after the plate is empty! I hope you enjoy them as much as I do! :)


Monday, January 16, 2012

Kvæfjordkaka with walnuts


Two years back, a Norwegian friend mentioned this delicious cake known as verden's beste kake (World's best cake). It's the most special of cakes and is thus reserved for occasions like birthdays, weddings and the national holiday. I admit, I couldn't wait for a more special occasion than my monthly visit by a few of my closest friends. I wanted to surprise them with a local dessert (interpret "local" loosely) that was guaranteed to please. Apart from the very specific methodology for preparation, it was actually one of the easiest cakes I had attempted, while at the same time visually appealing. Needless to say, it was a success and everyone appreciated it. I can't forget to this day how happy I felt when a Swedish friend commented that the taste had brought her home. Don't we all cook to please the ones' we share our food with?! I only wish I hadn't lost my pictures of that first Kvæfjordkaka.

The second time I made it was in honor of my successful passing of the driver's exam and my last day at home. I spent the holiday season with my parents in Bulgaria, where I indulged in Bulgarian vegetarian cuisine - my favorite! As soon as the holidays arrived though, I could only think about ways to represent my newly found Scandinavian cuisine with the one at home. It was gonna be its debut to my parents, so it had to be something amazing. So, it was decided! I'm not particularly fond of making the same dessert twice, so I needed something that will set it apart from the first one. After a small discussion with my dad, a few changes were integrated and I ventured on a what seemed a very long, but exciting cake-making.

I should warn here that if you want to learn precisely about Kvæfjordkaka, you should visit The transplantedbaker who I learnt the classic cake from.

So, here is my adaptation:

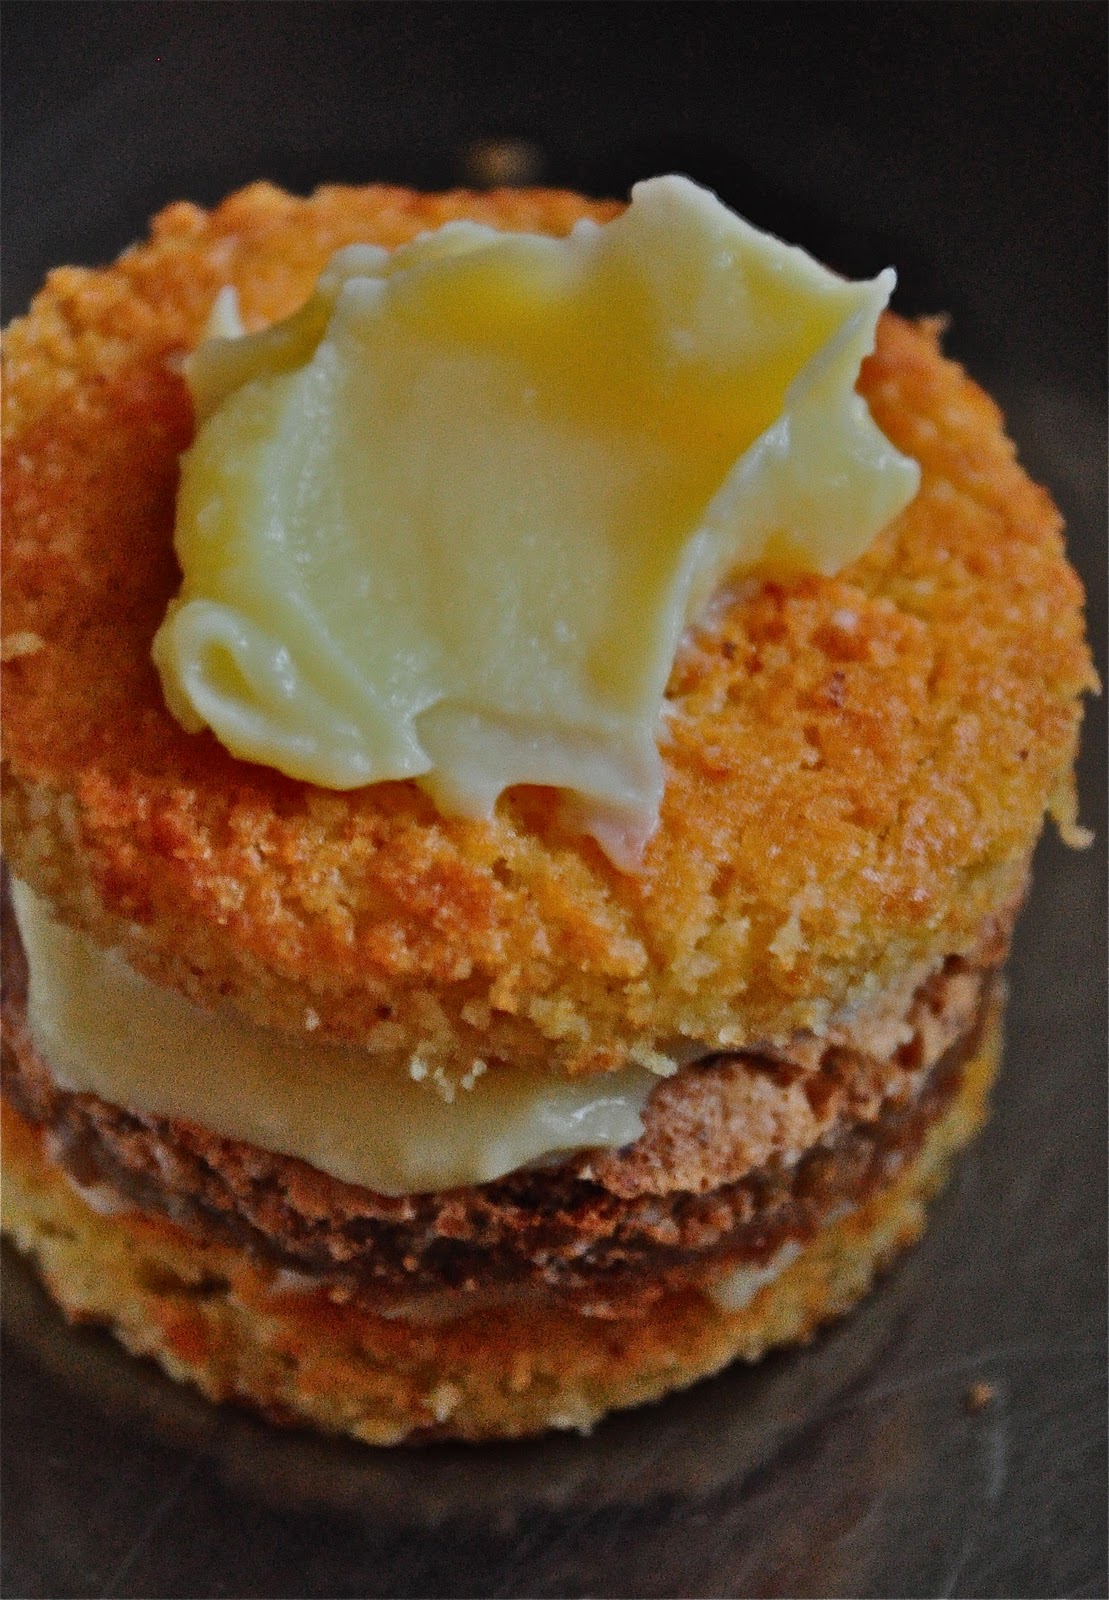
Instead of making a single layer of pastry and meringue, one cooked on top of the other, baked them separately. For the pastry layer, I used the Transplanted baker's recipe. Then, I cut out circles with a glass, so I could make individual portions of the cake.


Since my dad prefers a meringue layer mixed with walnuts, I added them to the egg whites once they were beaten and carefully folded the mixture. 


Then I proceded with the baking of that layer and cut out circles from it as well.


Instead of mixing the pastry cream with whipped cream, I refrigerated the pastry cream (which became as thick as butter and used it by itself. It is delicious enough by itself, I have to say.


Next, I used one pastry layer, then one meringue layer, interchanging them until I had two of each. One of the towers I named "the tower of Pisa" - I think we all can guess why. :)


Once I was done assembling the pieces, it was decoration time. My parents would have liked me to simply use the rest of the pastry cream and then sprinkle chopped walnuts on top, like I did with one of them.


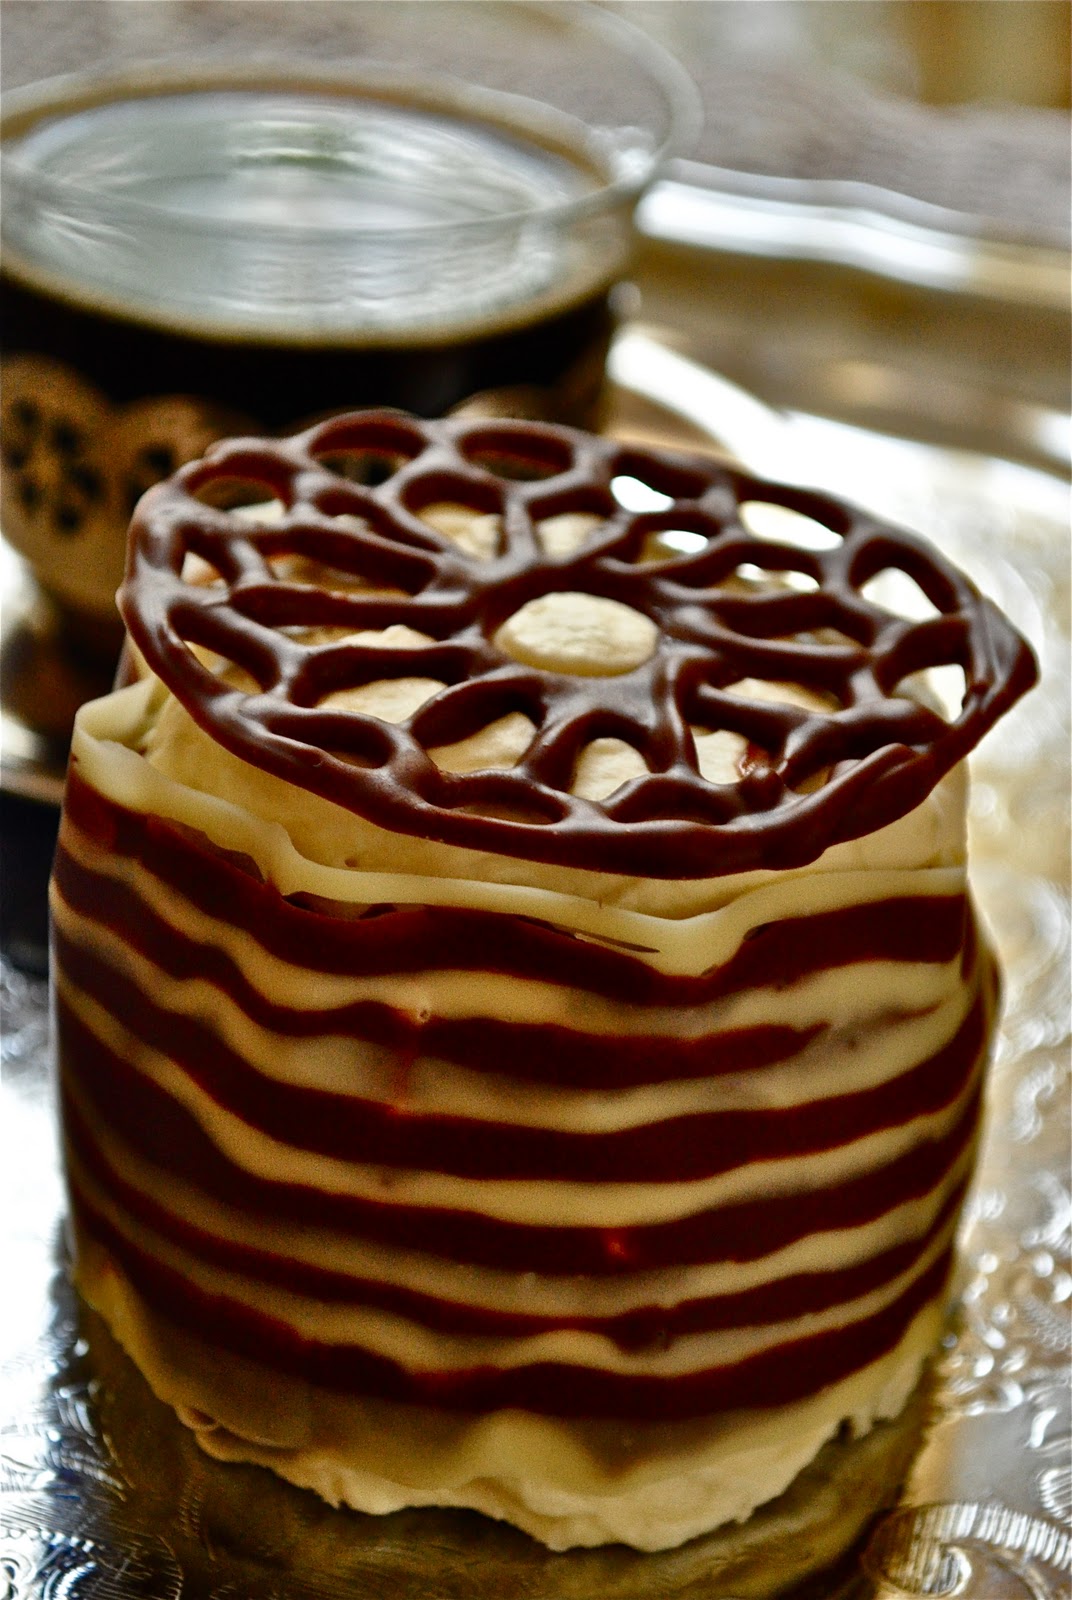
I had white and dark chocolate in my possession though, and there was no way I would take the easy road! So, what came next was a series of chocolate melting, ohs and ahs as quite a few of my ideas fell in ruins, desperation, talk about necessity of continuos practice in the art of chocolate decoration and a few simple, but more or less successfully executed pieces (I wanted them all to have different appearance). Eventually, I labored on three pieces and finished the last four in the manner my parents had suggested.


Note that I used the whipped cream to top the little cakes before I finished them with the chocolate.

Hopefully, next time the decoration will be more accomplished. :)


Локумки (Turkish delights wrapped in dough)

What I like most about this recipe is that the dough is neutral and the sweetness of the Turkish delights isn't overtaken. Instead, the walnuts add a bit of flavor and balance to it.  


Ingredients


1 cup natural yoghurt
1/2 cup sunflower oil/ melted butter
1/2 t. sp. baking soda
1 egg
flour (as much as it takes)
Turkish delights
walnuts
powdered sugar


Method


1. Put 200 g. sifted flour in a big bowl.
2. Add the baking soda in the yoghurt.
3. Add the yoghurt, the egg and the sunflower oil/ butter to the flour.
4. Form soft dough, adding flour as necessary.
5. Roll the dough out (0.5 mm thin) and use a glass to cut out circles.
6. Put small pieces of Turkish delight and walnut (one of each) on half of the dough circles.
7. Cover the circles with walnut and Turkish delight with the rest of the circles and use a fork to close them.
8. Use the rest of the dough to form balls filled with walnuts and Turkish delights. 
9. Bake everything on medium high temperature until ready.
10. Sprinkle powdered sugar when still slightly warm (optional).


Walnuts and dried fruit bites

Combining dried fruits and walnuts is not a new concept. Our ancestors have been using them as a regular meal. Nowadays, we munch them for snack between meals and during traveling or as ingredients in more complex dishes.  Going to basics, I and my sister combine them, making dessert bites (cake replacement for coffee/ tea time) appropriate for all seasons. On my last trip to Bulgaria, I even got my mom, my aunt and a couple of friends to fall in love with them. They're that good... and addictive!

Ingredients


3/4 cup of orange juice
1 1/2 cup of blended walnuts/ almonds (the finer they're blended, the easier it is to work with the dough)
1/4 cup of fine oatmeal (I blend that too until it looks like flour)
7 dried apricots 
4 dried plums
1/2 cup of raisin
3/4 cup of coconut flakes
2 t. sp. espresso/ rum (unless children will eat from them)
1 t. sp. honey


Method


1. Finely chop the dried fruit and leave it to soak in the orange juice for about 30 min.
2. Mix the nuts, the oatmeal and half of the coconut flakes in a bowl.
3. Add the soaked dried fruit, the espresso/ rum  and honey to the bowl and form dough out of everything. It should be moist and somewhat sticky, so that you can form bite-sized balls out of it.
4. Cover the balls with chopped nuts, coco powder and/ or the rest of the coconut flakes.


Note: You can add and replace ingredients to fit your taste!